
When is the last time you cleaned your windows? Getting your spring cleaning of a window list in order is a sure fire sign warmer weather is on the way. While cleaning out the garage, getting your mower serviced, and getting your yard tools ready for the season are on the top of your list, so are other cleaning activities such as cleaning your windows. In this blog we are going to learn about 7 tips you need to know for the spring cleaning of a window.
Why You Need To Clean Your Windows Regularly
Often you don’t realize just how dirty your windows are until you start to clean them. Clean windows can have a transformative effect on a room. It will brighten up the space, make it seem more airy and provide you with a cleaner and less obstructed view of the outside.
Washing your exterior windows should be part of your spring cleaning routine. Just like anything else in your home, you need to give your windows some care and attention to ensure they remain in top condition. Plus, if you clean your windows regularly you will be able to quickly identify issues with your windows as they happen. However, many homeowners overlook the importance of simple window cleaning.
But, Aren’t Vinyl Windows Difficult to Clean? No!
One of the reasons homeowners are reluctant to clean their windows or put them at the bottom of the cleaning “to do” list is because they think it’s more difficult than it really is. One of the best features of vinyl windows are they are very easy to clean. In fact, you can clean them like a pro. You just need the right tools for the job.
Ready To Clean Your Windows? What NOT To Do
Forget about using paper towels and a spray cleaner and scrubbing the windows. This is probably the most common technique used by homeowners. When you do this you are not actually getting your windows clean. You’re just moving dirt around. You are actually adding a static charge to the window, which can actually attract more dust. As soon as you’re done, your window may look dirty again. Plus, all that scrubbing is a lot of work!
7 Tip to Clean Vinyl Windows Like a Pro
Vinyl windows are known for being virtually maintenance free. But, they still need a good cleaning now and again.
How Often Should I Clean My Windows?
We know that cleaning your windows is probably not your favorite thing to do. But, the results will make it well worth it. Proper care and maintenance takes a small amount of time. In a perfect world, you should clean your windows twice per year, in the spring and also again in the fall. A couple hours of cleaning per year will make your windows look their very best.
How To Clean Your Windows Like A Pro
Take a look at the forecast and choose a warm and sunny day to clean the interior and exterior of your windows. Here are 7 pro tips to clean your vinyl windows and make them shine:
1. Invest In The Right Tools for Washing Windows
Cleaning your windows is not difficult. If you want to clean and maintain your windows like a pro, you need to have the right tools to do the job.
Whether you are cleaning your windows or doing any other job having the right tools is the key to a job well done. The right tools and techniques will give you the results you want.
Here’s a list of the tools and items you’ll need:
- • Mild soap
- • Spray bottle
- • Clean towel and soft cloths
- • Vinegar
- • A vacuum
- • Soft brush
- • Plastic putty knife
The truth is that cleaning your windows is not difficult. It’s actually really straightforward. As you can see from the above list, you likely have many of these tools at home already. Many of these supplies are available for low cost at almost any grocery or hardware store.
For the best results, consider getting a squeegee. They are the best tool you can use. Why do you think all windows washing professionals use them? They are simple, provide full coverage and are the best of getting rid of streaks.
There are also some things you should NOT use when cleaning your windows. Do not use the following to clean your windows:
- • Pressure washers
- • Harsh cleaners, bleach
- • Paint thinner
- • Polish or grease removers
- • Metal blades or sharp edges
Using these items could cause damage to you windows. They will do more harm than good. Steer clear of these items when cleaning your windows.
2.Inspect Your Windows First
Prior to cleaning, it’s a good idea to inspect your windows. It’s possible your windows could have been damaged or the winter, especially if it’s been a while since you last took a close look at your windows. Inspect all areas of your window – the glass, frame, screen, and surrounding area. Look for:
- • Warping of the frame
- • Cracks in the glass or frame
- • The presence of mold
- • Damage to the screen
- • Fogging or cracks in the glass – signs the seal has been broken on your window panes
If you notice any issues with your windows, its best to contact a windows professional to take a closer look before you start cleaning.
3. Clean ALL Parts Of Your Window
It’s important to clean ALL aspects of your window. If you only clean the glass, the other areas can easily spread dirt and dust. The debris from the window frame will spread to the glass. This is particularly the case on the exterior side of your windows.
4. Remove and Clean The Window Screens
Window screen often get overlooked. To avoid forgetting to clean your screens, do them first. Since the screen looks black, they can easily mask dirt and dusk. Place them on a flat surface to clean them and spray them with a water and vinegar mixture. You can place them in the tub or shower, or outside on the lawn or driveway. Do not pressure wash. If there is stuck on dirt, use a soft brush and lightly scrub.
Allow them to air dry before putting them back on your windows. Doing them first should give them enough time dry while you clean the other areas of the window.
Again, if you notice any damage to the screen, sashes, or other areas, give us a call to inspect your windows in greater detail.
5. Work From The Outside In
Dirt, grime, and mold all tend to build up on the outside of the window as much as the glass. The frames, window edges and sills are a prime location to clean. Washing these first ensures this dirt does not creep onto the window glass and spread. Give these areas a good cleaning before you start to clean the glass.
To clean the frame and trim on vinyl windows use a mild soap and sponge to lift the surface dirt. Wipe the area with a soft cloth. Try to do this quickly and avoid letting water pool or run down the frame. Repeat as needed until clean.
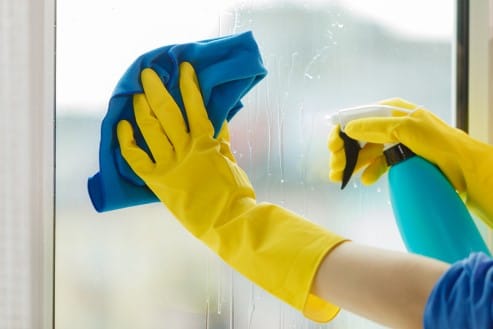
6. Wash The Glass
A water and vinegar mix will do the truck. Rise the glass with water to get it wet. Spray the cleaning solution mix. Make sure you don’t allow it to run and pool in the window tracks on the frame. Use a squeegee if possible to avoid streak. As an alternative, use newspaper instead of a cloth. This can also help prevent streaks from appearing.
7. Clean the Tracks and Reassemble
The last step is to clean the window tracks. Using a vacuum is the best option here. You can quickly remove loose dirt, dust, and spider webs. If there is larger build up, use a plastic putty knife to dislodge them. Use a silicone spray to lubricate the track once clean.
Reassemble all window components you removed before cleaning. Wipe down the hardware and spot clean any areas you may have missed.
You now have sparkling clean windows! So, these are the 7 tips you need to know for the spring cleaning of a window.
Have Questions About Vinyl Window Maintenance?
Have questions about maintaining your vinyl windows? We can help! Call us at 1-888-880-6827 anytime. We’ll happily provide you with window care tips to get the most out of your windows.
What Do I Do If There Is A Problem With My Windows?
If you notice an issue with your windows when you are doing some spring cleaning of a window, please give us a call. One of our windows experts can take a look. If you have older windows and it’s time for an upgrade, give us a call for a FREE estimate.
More Information About Vinyl Windows
Want to learn more about how to care for your residential windows? Check out these other great articles about vinyl windows:
7 Alarming Signs It’s Time To Replace Your House Windows In 2019
Upgrading To Triple Pane Glass – Is It Worth The Extra Investment?
Spring Maintenance Advice For Front Entry, Patio, And Garage Doors
What To Look For When Assessing Window Damage Caused By Winter Weather


